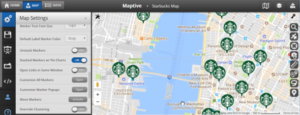
Customizing marker icons and labels on Google Maps enhances the visual appeal and usability of your maps. This guide walks you through the steps to use custom icons and labels for markers on your Google Maps, making your maps more informative and engaging.

Step 1: Set Up Your Basic Google Map
Before customizing marker icons and labels, you need a basic Google Map setup. If you haven’t done this yet, follow these steps:
- Obtain a Google Maps API Key
- Sign in to the Google Cloud Console.
- Create a new project or use an existing one.
- Enable the Maps JavaScript API.
- Generate and copy your API key.
- Create an HTML File
- Open your text editor and create a new HTML file, such as
index.html.
- Open your text editor and create a new HTML file, such as
- Add Basic HTML Structure
- Use the following code to set up your basic map:
html
<!DOCTYPE html>
<html lang="en">
<head>
<meta charset="UTF-8">
<meta name="viewport" content="width=device-width, initial-scale=1.0">
<title>Custom Marker Icons and Labels</title>
<style>
#map {
height: 100vh; /* Full height of the viewport */
width: 100%; /* Full width */
}
</style>
</head>
<body>
<div id="map"></div>
<script>
function initMap() {
var location = { lat: -34.397, lng: 150.644 };var map = new google.maps.Map(document.getElementById('map'), {
zoom: 8,
center: location
});var marker = new google.maps.Marker({
</script>
position: location,
map: map,
title: 'Hello World!'
});
}
<script src="https://maps.googleapis.com/maps/api/js?key=YOUR_API_KEY&callback=initMap" async defer></script>
</body>
</html>
- Replace
YOUR_API_KEYwith your actual API key.
- Use the following code to set up your basic map:
Step 2: Customize Marker Icons
To use custom icons for your markers, you need to specify the URL of the icon image.
- Add a Custom Icon to a Marker
Update the
initMapfunction in yourindex.htmlfile to include a custom icon:javascriptfunction initMap() {
var location = { lat: -34.397, lng: 150.644 };var map = new google.maps.Map(document.getElementById('map'), {
zoom: 8,
center: location
});var marker = new google.maps.Marker({
position: location,
map: map,
title: 'Hello World!',
icon: 'https://example.com/path/to/your-icon.png' // Custom icon URL
});
}
- Replace
https://example.com/path/to/your-icon.pngwith the URL of your custom icon.
- Replace
- Icon Size and Scale
You can adjust the size of your custom icon using the
scaledSizeproperty:javascripticon: {
url: 'https://example.com/path/to/your-icon.png',
scaledSize: new google.maps.Size(50, 50) // Set the size of the icon
}
Step 3: Customize Marker Labels
Labels are text that appears alongside or on top of a marker.
- Adding a Label to a Marker
Update the
initMapfunction to include a label:javascriptfunction initMap() {
var location = { lat: -34.397, lng: 150.644 };var map = new google.maps.Map(document.getElementById('map'), {
zoom: 8,
center: location
});var marker = new google.maps.Marker({
position: location,
map: map,
title: 'Hello World!',
icon: 'https://example.com/path/to/your-icon.png',
label: {
text: 'A', // Label text
color: 'black', // Text color
fontSize: '16px' // Font size
}
});
}
- Customizing Label Styles
- Text Color: Adjust the
colorproperty in the label object. - Font Size: Change the
fontSizeproperty. - Font Weight: To make the text bold, use
fontWeightin the style:javascriptlabel: {
text: 'A',
color: 'black',
fontSize: '16px',
fontWeight: 'bold' // Make the label bold
}
- Text Color: Adjust the
Step 4: Adding Multiple Markers
To add multiple markers with custom icons and labels, use an array of marker objects:
- Update the
initMapFunctionjavascriptfunction initMap() {
var locations = [
{ lat: -34.397, lng: 150.644, icon: 'https://example.com/path/to/icon1.png', label: 'A' },
{ lat: -35.397, lng: 151.644, icon: 'https://example.com/path/to/icon2.png', label: 'B' }
];var map = new google.maps.Map(document.getElementById('map'), {
zoom: 8,
center: locations[0]
});locations.forEach(location => {
new google.maps.Marker({
position: { lat: location.lat, lng: location.lng },
map: map,
icon: location.icon,
label: {
text: location.label,
color: 'black',
fontSize: '16px'
}
});
});
}
Conclusion
Customizing marker icons and labels in Google Maps enhances the interactivity and usability of your maps. By following the steps outlined in this guide, you can integrate custom icons and labels into your markers, making your maps more visually appealing and informative. Experiment with different icons, sizes, and label styles to create a map that best suits your application’s needs.


