Custom markers and info windows are essential for enhancing the interactivity and user experience of Google Maps. By tailoring these elements to fit your application’s needs, you can provide users with more engaging and informative map experiences. This guide will walk you through the process of creating and customizing markers and info windows using Google Maps and JavaScript.

Introduction
Markers pinpoint specific locations on a map, while info windows provide additional context and information. Customizing these elements allows you to align them with your application’s branding and user interface, making your maps more intuitive and visually appealing. This article will cover the basics of creating markers and info windows and then delve into more advanced customization techniques.
Setting Up the Google Maps API
To get started, you’ll need to set up the Google Maps API in your project.
- Obtain an API Key:
- Visit the Google Cloud Platform and create a new project.
- Enable the Google Maps JavaScript API for your project.
- Generate an API key and restrict it to your domain for security purposes.
- Include the API Script in Your HTML:
- Add the Google Maps API script to your HTML file.
<html>
<head>
<title>Custom Markers and Info Windows</title>
<script src="https://maps.googleapis.com/maps/api/js?key=YOUR_API_KEY"></script>
<style>
#map {
height: 100%;
width: 100%;
}
html, body {
height: 100%;
margin: 0;
padding: 0;
}
</style>
</head>
<body>
<div id="map"></div>
<script>
function initMap() {
var options = {
zoom: 8,
center: { lat: 34.0522, lng: -118.2437 } // Los Angeles
}
var map = new google.maps.Map(document.getElementById('map'), options);
}
</script>
</body>
</html>
Creating Basic Markers
Markers are the foundation of interactive maps, allowing users to pinpoint locations.
- Add a Basic Marker:
- Create a marker and add it to the map within the
initMapfunction.
- Create a marker and add it to the map within the
function initMap() {

  var options = {

    zoom: 8,

    center: { lat: 34.0522, lng: -118.2437 }

  }

  var map = new google.maps.Map(document.getElementById('map'), options);
  var marker = new google.maps.Marker({

    position: { lat: 34.0522, lng: -118.2437 },

    map: map,

    title: 'Los Angeles'

  });

}
Customizing Markers
Custom markers can help your map stand out and provide additional context to users.
- Use Custom Icons:
- Replace the default marker icon with a custom image.
var marker = new google.maps.Marker({

  position: { lat: 34.0522, lng: -118.2437 },

  map: map,

  title: 'Los Angeles',

  icon: 'path_to_custom_icon.png' // Specify the path to your custom icon

});
- Add Animation to Markers:
- Make your markers more dynamic by adding animations such as bounce or drop.
var marker = new google.maps.Marker({

  position: { lat: 34.0522, lng: -118.2437 },

  map: map,

  title: 'Los Angeles',

  animation: google.maps.Animation.DROP // Options: BOUNCE or DROP

});
Creating Info Windows
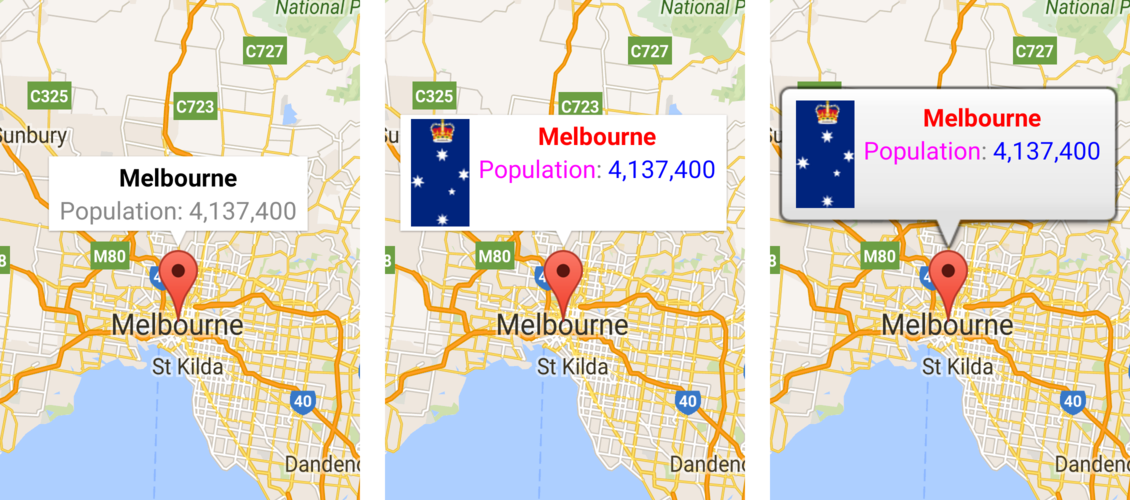
Info windows display information when users interact with markers, providing valuable context.
- Basic Info Window:
- Create an info window and link it to a marker.
var infoWindow = new google.maps.InfoWindow({

  content: '<h3>Los Angeles</h3><p>The city of angels.</p>'

});
marker.addListener('click', function() {

  infoWindow.open(map, marker);

});
- Customizing Info Windows:
- Enhance info windows with custom HTML content and styles.
var contentString = '<div id="content">' +

  '<h1>Los Angeles</h1>' +

  '<p>Known for its Mediterranean climate, ethnic diversity, and the entertainment industry.</p>' +

  '</div>';
var infoWindow = new google.maps.InfoWindow({

  content: contentString

});
marker.addListener('click', function() {

  infoWindow.open(map, marker);

});
Advanced Customizations
For more advanced interactivity, consider these techniques:
- Cluster Markers:
- Use marker clustering to manage a large number of markers efficiently.
<script src="https://developers.google.com/maps/documentation/javascript/examples/markerclusterer/markerclusterer.js"></script>

<script>

  var markers = [ /* Array of marker data */ ];

  var markerCluster = new MarkerClusterer(map, markers, { imagePath: 'path_to_cluster_images' });

</script>
- Animated Info Windows:
- Use CSS and JavaScript to animate the opening and closing of info windows.
<style>

  .info-window-content {

    transition: opacity 0.3s;

  }

</style>
infoWindow.addListener('domready', function() {

  var iwOuter = document.querySelector('.gm-style-iw');

  iwOuter.classList.add('info-window-content');

});
Conclusion
Creating custom markers and info windows using Google Maps and JavaScript enhances the interactivity and user experience of your maps. By customizing these elements, you can provide more context, improve aesthetics, and ensure that your map aligns with your application’s branding.
Next Steps
Experiment with different marker and info window customizations to find what best suits your application’s needs. Explore additional Google Maps API features, such as polylines, polygons, and custom overlays, to further enhance your maps. The more you experiment, the more proficient you will become at creating rich, interactive map experiences.


