Custom markers can significantly enhance the user experience on your Google Maps by providing a visually distinct way to highlight locations. Whether you’re adding personalized icons or interactive features, the Google Maps JavaScript API offers a range of options to create and manage custom markers. This guide will walk you through the process of adding custom markers to Google Maps using JavaScript.
1. Obtain Your Google Maps API Key
To use the Google Maps JavaScript API, you need an API key:
- Create a Google Cloud Project: Visit the Google Cloud Console and create a new project.
- Enable Google Maps JavaScript API: In the API Library, search for and enable the “Google Maps JavaScript API.”
- Generate an API Key: Go to the Credentials section to create your API key. This key is necessary for making API requests.
2. Include the Google Maps JavaScript API in Your HTML
Add the following script to include the Google Maps JavaScript API in your HTML file:
<html>
<head>
<title>Custom Markers on Google Maps</title>
<script src="https://maps.googleapis.com/maps/api/js?key=YOUR_API_KEY"></script>
<style>
#map {
height: 500px;
width: 100%;
}
</style>
</head>
<body>
<div id="map"></div>
<script>
// JavaScript code to add custom markers
</script>
</body>
</html>
Replace YOUR_API_KEY with your actual Google Maps API key.
3. Initialize the Map
Create a basic map setup in your JavaScript:
function initMap() {

    var mapOptions = {

        center: {lat: -34.397, lng: 150.644},

        zoom: 8

    };
    var map = new google.maps.Map(document.getElementById('map'), mapOptions);

}
google.maps.event.addDomListener(window, 'load', initMap);
This code initializes a map centered at a specific location with a given zoom level.
4. Add Custom Markers
To add a custom marker, use the google.maps.Marker class with custom icon settings:
function initMap() {

    var mapOptions = {

        center: {lat: -34.397, lng: 150.644},

        zoom: 8

    };
    var map = new google.maps.Map(document.getElementById('map'), mapOptions);
    var marker = new google.maps.Marker({

        position: {lat: -34.397, lng: 150.644},

        map: map,

        title: 'Custom Marker',

        icon: 'https://example.com/path/to/custom-icon.png'

    });

}
Replace the icon URL with the path to your custom marker image. The title property adds a tooltip that appears when hovering over the marker.
5. Add Info Windows to Markers
Info windows provide additional information when users click on a marker:
function initMap() {

    var mapOptions = {

        center: {lat: -34.397, lng: 150.644},

        zoom: 8

    };
    var map = new google.maps.Map(document.getElementById('map'), mapOptions);
    var marker = new google.maps.Marker({

        position: {lat: -34.397, lng: 150.644},

        map: map,

        title: 'Custom Marker',

        icon: 'https://example.com/path/to/custom-icon.png'

    });
    var infowindow = new google.maps.InfoWindow({

        content: '<div><h3>Custom Location</h3><p>This is an info window.</p></div>'

    });
    marker.addListener('click', function() {

        infowindow.open(map, marker);

    });

}
Clicking on the marker will display an info window with your custom content.
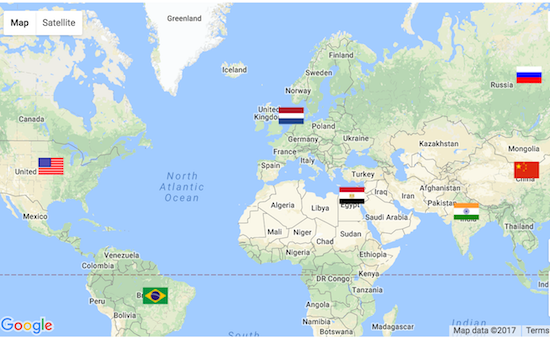
6. Use Custom Marker Icons
You can use custom icons for markers to make them stand out. Ensure the icons are appropriately sized (e.g., 32×32 pixels) and formatted (PNG, SVG):
function initMap() {

    var mapOptions = {

        center: {lat: -34.397, lng: 150.644},

        zoom: 8

    };
    var map = new google.maps.Map(document.getElementById('map'), mapOptions);
    var customIcon = {

        url: 'https://example.com/path/to/custom-icon.png',

        scaledSize: new google.maps.Size(50, 50), // Resize the icon

        origin: new google.maps.Point(0, 0), // Origin point of the icon

        anchor: new google.maps.Point(25, 50) // Anchor point of the icon

    };
    var marker = new google.maps.Marker({

        position: {lat: -34.397, lng: 150.644},

        map: map,

        icon: customIcon

    });

}
7. Cluster Markers for Better Visualization
For maps with multiple markers, use marker clustering to improve visualization:
- Include MarkerClusterer Library: Add the MarkerClusterer library to your project:
html
<script src="https://developers.google.com/maps/documentation/javascript/examples/markerclusterer/markerclusterer.js"></script>
- Add Marker Clustering to Your Map:
javascript
function initMap() {
var mapOptions = {
center: {lat: -34.397, lng: 150.644},
zoom: 8
};var map = new google.maps.Map(document.getElementById('map'), mapOptions);
var markers = [
new google.maps.Marker({position: {lat: -34.397, lng: 150.644}}),
new google.maps.Marker({position: {lat: -34.407, lng: 150.654}}),
// Add more markers here
];var markerCluster = new MarkerClusterer(map, markers, {
imagePath: 'https://developers.google.com/maps/documentation/javascript/examples/markerclusterer/m'
});
}
8. Optimize Marker Performance
- Use Efficient Icons: Optimize marker images for faster loading.
- Batch Marker Addition: Add markers in batches to reduce rendering time.
- Limit Marker Count: Avoid adding excessive markers; use clustering for large datasets.
9. Test and Iterate
- Test Across Devices: Ensure custom markers work well on various devices and browsers.
- Gather User Feedback: Use feedback to refine marker placements and interactions.
Conclusion
Adding custom markers to Google Maps with JavaScript allows you to create a unique and interactive mapping experience. By customizing marker icons, adding info windows, and using marker clustering, you can effectively highlight important locations and provide valuable information. Follow these steps to implement and enhance your custom markers, tailoring the map to suit your specific needs and preferences.