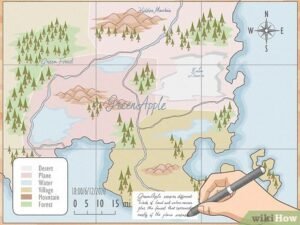
Creating a basic map using the Google Maps API is a great starting point for integrating maps into your web application. This guide will walk you through the steps to set up a basic map, including configuring the map’s center, zoom level, and basic features.

1. Setting Up Your Google Maps API Key
Before you start, you’ll need an API key from Google Cloud Console. Here’s how to get it:
- Create a Google Cloud Project:
- Go to the Google Cloud Console.
- Click on the project drop-down and select “New Project.”
- Enter a project name and click “Create.”
- Enable the Google Maps JavaScript API:
- Navigate to the “APIs & Services” > “Library.”
- Search for “Google Maps JavaScript API” and enable it for your project.
- Generate an API Key:
- Go to “APIs & Services” > “Credentials.”
- Click on “Create Credentials” and select “API Key.”
- Copy the generated API key and keep it secure.
2. Creating a Basic HTML File
To display a map, you need to include the Google Maps JavaScript API in your HTML file. Here’s a simple example:
html
<!DOCTYPE html>

<html>

<head>

<title>Basic Google Map</title>

<style>

/* Map container styling */

#map {

height: 100%;

width: 100%;

}

/* Full page height */

html, body {

height: 100%;

margin: 0;

padding: 0;

}

</style>

<script>

// Initialize the map

function initMap() {

// Create a map object and specify the DOM element for display

var map = new google.maps.Map(document.getElementById('map'), {

center: { lat: -34.397, lng: 150.644 }, // Center of the map

zoom: 8 // Zoom level

});

}

</script>

</head>

<body onload="initMap()">

<!-- Map container -->

<div id="map"></div>

<!-- Google Maps API script -->

<script async defer

src="https://maps.googleapis.com/maps/api/js?key=YOUR_API_KEY&callback=initMap">

</script>

</body>

</html>
Replace YOUR_API_KEY with the API key you obtained from the Google Cloud Console.
3. Understanding the Code
- HTML Structure:
- The
<div id="map"></div>element is where the map will be displayed. - The
onload="initMap()"attribute in the<body>tag ensures the map initializes when the page loads.
- The
- CSS Styling:
- The
#mapID in CSS sets the size of the map container to fill the entire viewport.
- The
- JavaScript Function:
- The
initMapfunction initializes the map. It creates agoogle.maps.Mapobject, specifying the center and zoom level. - The
centerproperty sets the latitude and longitude for the center of the map. - The
zoomproperty sets the zoom level (1 = world view, 20 = street view).
- The
4. Customizing Your Map
You can further customize your map by adding markers, controls, and other features.
4.1. Adding a Marker
To add a marker to your map, extend the initMap function:
javascript
function initMap() {

var map = new google.maps.Map(document.getElementById('map'), {

center: { lat: -34.397, lng: 150.644 },

zoom: 8

});position: { lat: –34.397, lng: 150.644 },
map: map,
title: ‘Hello World!’
});
}
4.2. Adding a Custom Map Style
Customize the map’s appearance using styles:
javascript
function initMap() {

var map = new google.maps.Map(document.getElementById('map'), {

center: { lat: -34.397, lng: 150.644 },

zoom: 8,

styles: [

{

"elementType": "geometry",

"stylers": [{ "color": "#212121" }]

},

{

"elementType": "labels.icon",

"stylers": [{ "visibility": "off" }]

}

]

});

}
4.3. Adding Map Controls
Add controls like zoom and street view:
javascript
function initMap() {

var map = new google.maps.Map(document.getElementById('map'), {

center: { lat: -34.397, lng: 150.644 },

zoom: 8,

zoomControl: true,

streetViewControl: true

});

}
5. Testing Your Map
- Local Testing: Open the HTML file in a web browser to see your map.
- Debugging: Use the browser’s developer console to troubleshoot any issues.
6. Conclusion
Creating a basic map with the Google Maps API is straightforward and provides a foundation for more advanced features. By following the steps outlined in this guide, you can integrate a functional map into your web application and customize it according to your needs.


