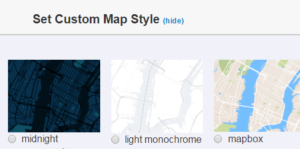
Custom map styles allow you to personalize the appearance of Google Maps to match the design and branding of your application or website. By using custom styles, you can change colors, hide features, and create a unique look that enhances user experience and integrates seamlessly with your application’s design. This guide will walk you through the process of applying custom map styles using the Google Maps JavaScript API.

Step 1: Set Up Your Google Maps JavaScript API
Before you can use custom map styles, you need to set up Google Maps JavaScript API. If you haven’t done this yet, follow these steps:
- Obtain an API Key
- Go to the Google Cloud Console.
- Create a new project or select an existing one.
- Navigate to APIs & Services > Credentials and create an API key.
- Enable the Maps JavaScript API
- Go to APIs & Services > Library.
- Search for Maps JavaScript API and enable it.
Step 2: Create and Apply Custom Map Styles
- Generate Custom Styles
You can create custom map styles using tools like:
These tools provide user-friendly interfaces for customizing map styles and exporting them in JSON format.
For example, using the Google Maps Styling Wizard, you can customize features such as:
- Color of roads and landmarks
- Visibility of map elements (e.g., parks, water bodies)
- Label styling for place names and streets
Once you’ve customized your map style, you’ll get a JSON configuration that looks something like this:
json[
{
"elementType": "geometry",
"stylers": [
{
"color": "#212121"
}
]
},
{
"elementType": "labels.icon",
"stylers": [
{
"visibility": "off"
}
]
},
{
"elementType": "labels.text.fill",
"stylers": [
{
"color": "#757575"
}
]
}
]
- Add Custom Styles to Your Map
Create an HTML file and set up the map with your custom styles:
html
<html lang="en">
<head>
<meta charset="UTF-8">
<meta name="viewport" content="width=device-width, initial-scale=1.0">
<title>Custom Map Styles</title>
<style>
#map {
height: 100vh;
width: 100%;
}
</style>
</head>
<body>
<div id="map"></div>
<script>
function initMap() {
const map = new google.maps.Map(document.getElementById('map'), {
center: { lat: 40.730610, lng: -73.935242 },
zoom: 12,
styles: [
{
"elementType": "geometry",
"stylers": [
{
"color": "#212121"
}
]
},
{
"elementType": "labels.icon",
"stylers": [
{
"visibility": "off"
}
]
},
{
"elementType": "labels.text.fill",
"stylers": [
{
"color": "#757575"
}
]
}
]
});
}
</script>
<script src="https://maps.googleapis.com/maps/api/js?key=YOUR_API_KEY&callback=initMap" async defer></script>
</body>
</html>
- Replace
YOUR_API_KEYwith your actual Google Maps API key. - In the
stylesproperty of theMapobject, insert your custom JSON styles.
- Replace
- Test Your Custom Map
- Save your HTML file and open it in a web browser.
- Verify that your custom styles are applied correctly to the map.
Step 3: Advanced Customization
- Dynamic Styling
You can dynamically change map styles based on user interactions or application states. For instance, switch between different styles to highlight specific features or events.
javascriptfunction changeMapStyle(styleArray) {
map.setOptions({ styles: styleArray });
}
Call this function with different style arrays based on your needs.
- Combining Styles
Combine different styles to create complex visual effects. Customize multiple elements and features to achieve the desired look for your map.
- Integrating with Other Features
Combine custom map styles with other Google Maps features such as markers, overlays, and layers to create a cohesive and engaging user experience.
Conclusion
Using custom map styles allows you to tailor Google Maps to fit your application’s design and branding, providing a unique and consistent visual experience for your users. By following the steps outlined in this guide, you can create and apply custom styles, enhance your map’s appearance, and integrate it seamlessly into your web applications. Explore different styling options and tools to achieve the best results for your project.


